Difference between revisions of "Arcane University:Dynamic Book Entries"
(Creating the page & first draft) |
|||
| (2 intermediate revisions by one other user not shown) | |||
| Line 1: | Line 1: | ||
| − | This guide covers how to implement a book with text that can dynamically update depending on conditions you set. Basic knowledge of [ | + | {{Trail|Implementation}} |
| + | |||
| + | This guide covers how to implement a book with text that can dynamically update depending on conditions you set. Basic knowledge of [[Arcane University:Quest Implementation|Quest Implementation]] and [[Arcane University:Mechanics Implementation|Papyrus scripting]] is strongly recommended. This method does not require SKSE. | ||
| Line 28: | Line 30: | ||
* Creating new items | * Creating new items | ||
* Creating and working with Reference Aliases | * Creating and working with Reference Aliases | ||
| + | |||
| + | === Resources === | ||
| + | |||
| + | * [https://github.com/m0yme/-Skyrim--Dynamic-Book-Entries-Tutorial Example mod made for this tutorial] | ||
== Starting Off: Creating the Items == | == Starting Off: Creating the Items == | ||
| Line 194: | Line 200: | ||
Testing this out in-game will show that this works. Right now, it only switches to '''Paragraph 1''' or '''Paragraph 2''', though. To change this, open up the '''Tutorial_Paragraph1''' and '''Tutorial_Paragraph2''' miscellaneous items and enter your text into the '''Name''' field of their windows. As mentioned above, this way you have a limit of '''259 characters'''! Now it's up to you to be creative with this method and expand it as you want. | Testing this out in-game will show that this works. Right now, it only switches to '''Paragraph 1''' or '''Paragraph 2''', though. To change this, open up the '''Tutorial_Paragraph1''' and '''Tutorial_Paragraph2''' miscellaneous items and enter your text into the '''Name''' field of their windows. As mentioned above, this way you have a limit of '''259 characters'''! Now it's up to you to be creative with this method and expand it as you want. | ||
| + | |||
| + | [[Category:Arcane University]] | ||
Latest revision as of 17:19, 24 November 2021
This guide covers how to implement a book with text that can dynamically update depending on conditions you set. Basic knowledge of Quest Implementation and Papyrus scripting is strongly recommended. This method does not require SKSE.
Introduction[edit]
What are "Dynamic Book Entries" exactly?[edit]
Imagine owning a journal (maybe you actually own one). You can open it, write your thoughts and experiences into it, and it only ever becomes unchangeable when all its pages are filled. Easy, right? A more game-focused example is Red Dead Redemption 2's journal, where the protagonist dynamically records his thoughts and experiences, with changes depending on choices made. Unfortunately, Skyrim has no built-in, straightforward way of doing this. This makes most books you can find in the game static, their text unchangeable once it's all been compiled into the game.
With this method I've developed, you can circumvent Skyrim's limitations in this regard and implement books with text that can change and be replaced depending on conditions that you set. This video shows an example of this.
Cool! What's the point?[edit]
It's entirely up to you! There's a lot of ways to make use of it. Let your creativity flow free and far - as far as you could take this method!
What are the limitations?[edit]
As this method is principally a workaround, it suffers from a few drawbacks.
- A character limit of 259 characters per entry
- A reference alias and item per paragraph variation
What do I need to know for this?[edit]
This method isn't so complex as to warrant you needing to be an expert in Skyrim modding. However, basic knowledge of how to create a quest and script using the Papyrus language is definitely of use. Other topics that'll be touched in this tutorial:
- Creating a start-game enabled quest
- Creating new items
- Creating and working with Reference Aliases
Resources[edit]
Starting Off: Creating the Items[edit]
It may seem weird that the trick to making this work lies in items, but you'll find that counter-intuitive solutions can be the best way to deal with problems. For this tutorial, you'll need to create the following items:
- A book
- Three miscellaneous items
Creating your Dynamic Book[edit]
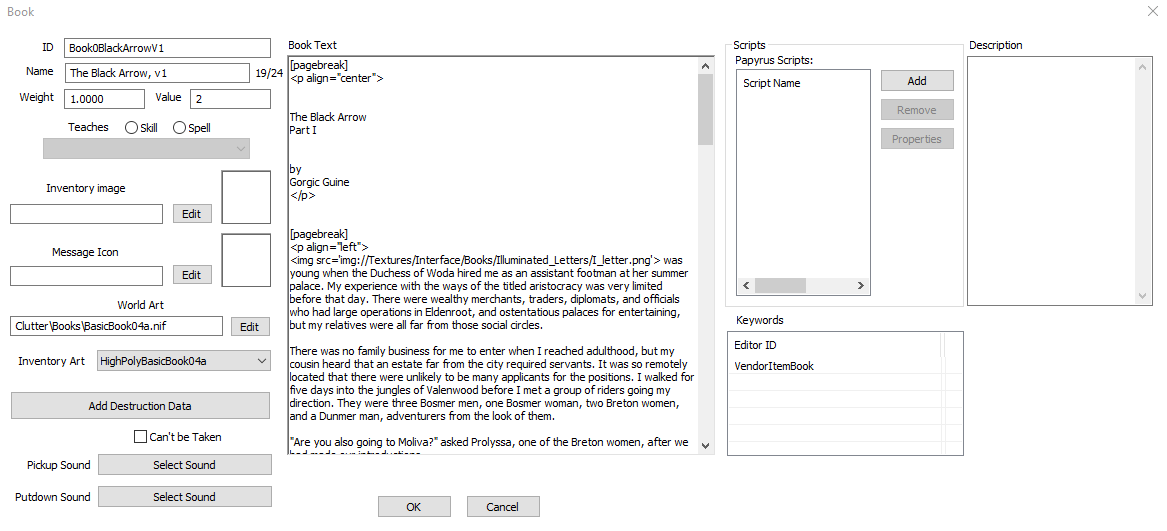
In the Object Window, navigate to Items and then to Books. Since books require their in-game models to be pointed out in the Creation Kit, we'll cut the process short and simply copy a pre-existing book. To do this, scroll down or use the Object Window's Filter search function to find the book Book0BlackArrowV1. Double-click it to open it.
We're now going to change a number of things in this window. Don't worry, if you follow this tutorial properly it won't affect the original book in any way.
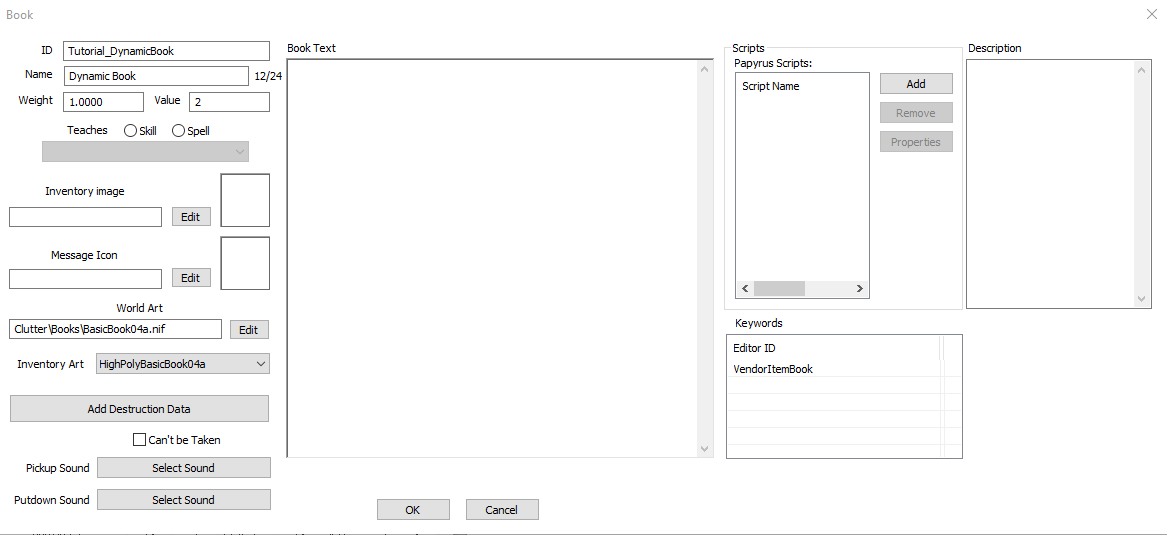
- In the ID field, delete the original ID and enter Tutorial_DynamicBook instead.
- In the Name field, once again replace the original with Dynamic Book.
- In the large Book Text field in the center of the window, delete everything!
Your window should now look as it does below:
Now press OK to save this book. A window will pop up titled "Create New Object?": press Yes and it'll save Tutorial_DynamicBook as its own object, leaving the original Book0BlackArrowV1 intact and untouched.
Creating your Paragraph-Storers[edit]
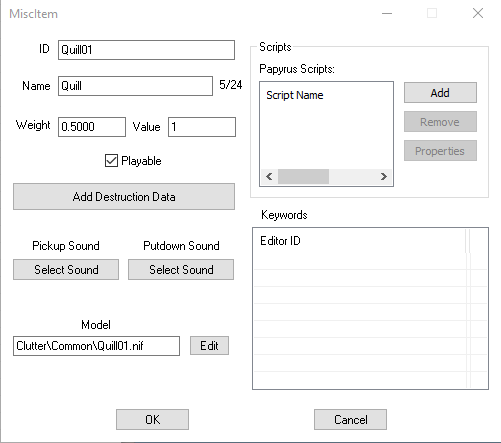
For this step, once again navigate to the Items section in the Object Window and then to MiscItem. Pop it open by pressing the plus and navigate to CLUTTER. Strictly seen you can use any of the items in this list to perform this trick: I will use quills. To find the base object of quills, Quill01, either scroll until you find it or use the Filter search field. Double-click the item to open it.
Similar to the book before, do the following steps:
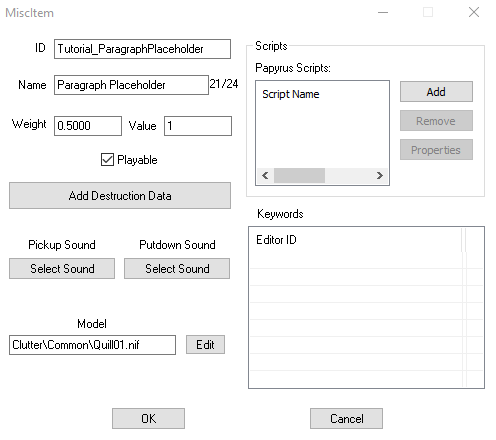
- In the ID field, replace the ID with Tutorial_ParagraphPlaceholder
- In the Name field, replace the name with Paragraph Placeholder
Click OK and then Yes to save this new item you've created. Now you need to create two more iterations of this item: the caveat is that you need to ID them as respectively Tutorial_Paragraph1 and Tutorial_Paragraph2, their names being Paragraph 1 and Paragraph 2. Do this the exact same way as the first item.
End Product[edit]
If you've done this correctly, you should now have four new items in your CK as shown below. We'll now move to the next step in this method, making a quest.
The Backbone Quest[edit]
Dynamic book entries need a quest that runs in the background to work. If you haven't created a quest yet, I recommend checking out the Creation Kit wiki's Quest Design Fundamentals tutorial. The process itself is easy enough, but getting this part right is crucial to making the whole method work. Pay close attention.
Creating the Quest[edit]
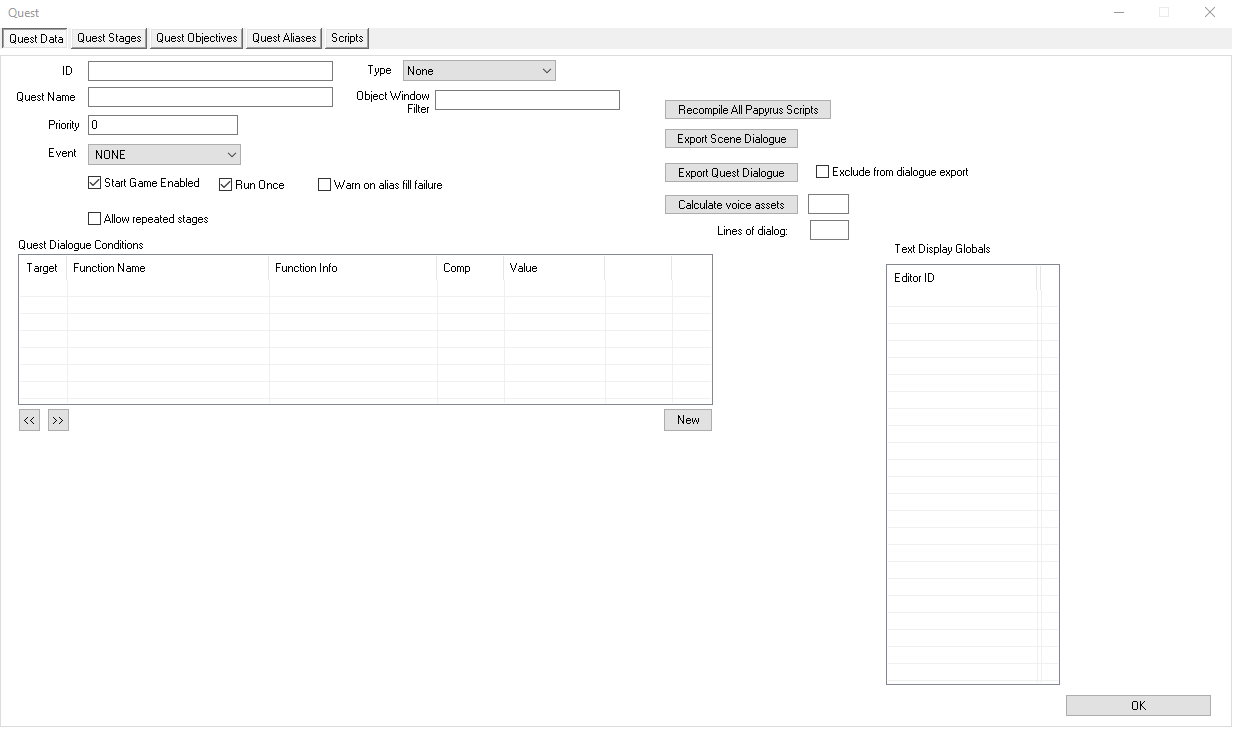
To create a quest, navigate in the Object Window to Character and then Quest. The window to the right will display all quests in the game: to proceed, right click inside that window and selected New. You'll be shown a new window.
For now, do simply the following steps:
- In the ID field, enter Tutorial_DynamicBookQuest
- The Name field can stay empty, but it might help to give it an appropriate name for organizational purposes if you do several of these dynamic books
- Tick off Run Once, keep Start Game Enabled ticked
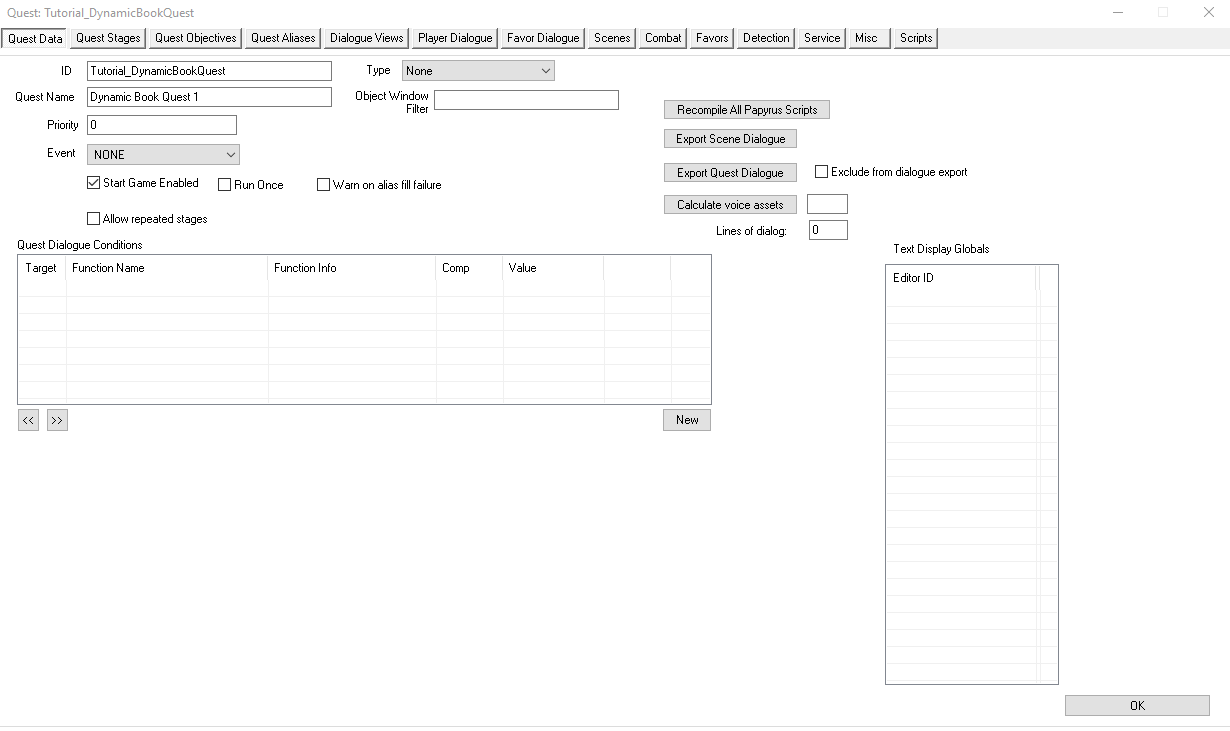
Now press OK. This will close the window - just reopen the quest and you should find a window looking something like this. Don't forget to create an SEQ file in order for the quest to be able to start!
Before we can continue further with this quest, we need to take a little detour.
Preparing the Reference Aliases[edit]
Press OK again to close the window. I know it's weird to do so as the first step in creating the Reference Aliases this quest needs to function properly, but just follow my lead on this one. This procedure for generating the reference aliases is not the only one that can function, but it suffices to make the concept clear.
What we're doing now is placing Tutorial_DynamicBook into the world and creating a means for the Tutorial_Paragraph[x] objects to be placed as well. We'll do this by physically placing Tutorial_DynamicBook into a given cell and creating a chest where the Tutorial_Paragraph[x] misc items can be generated. For this, we'll use the MixwaterMillWorkersHouse interior cell that you may already know from the Bendu Olo quest design tutorial.
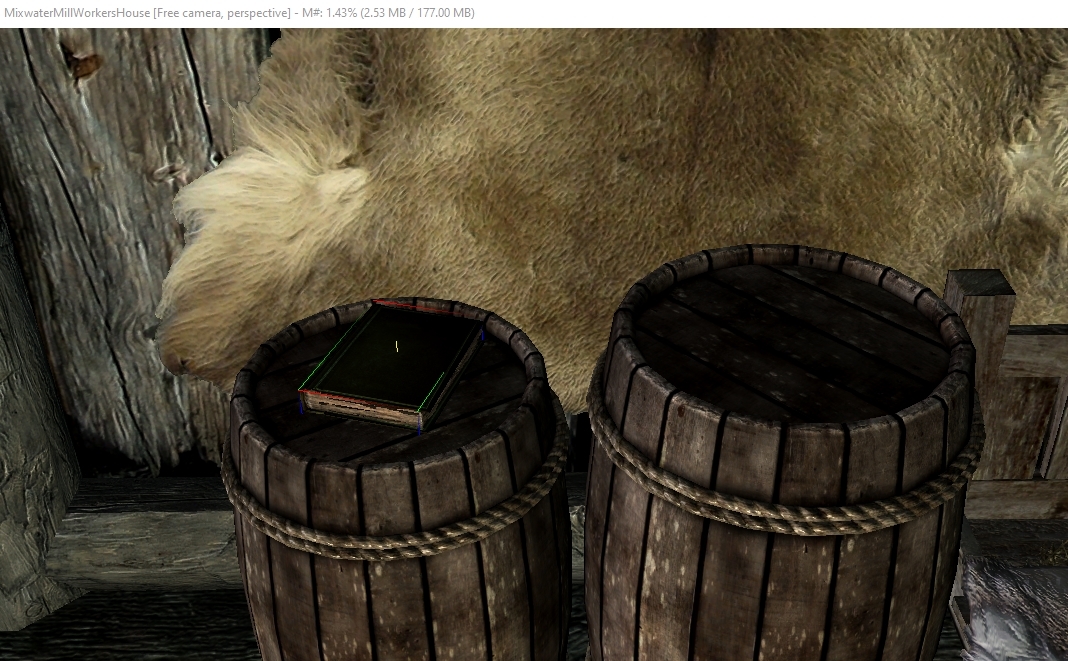
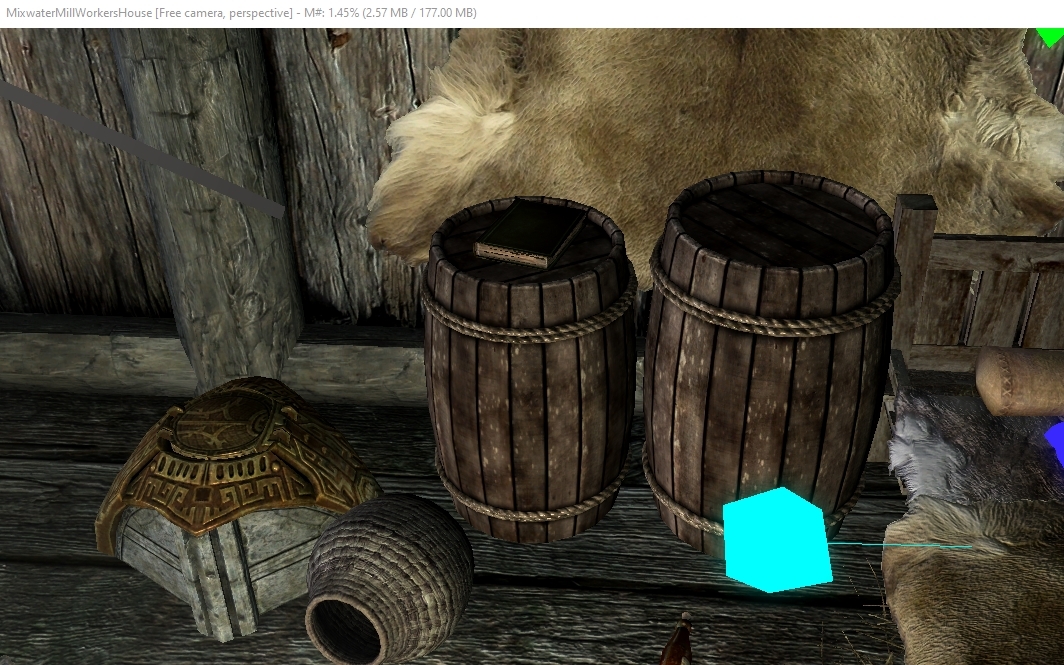
Open the MixwaterMillWorkersHouse interior cell via the Cell View window. In the cell, navigate to the two barrels next to the central bed. Go back to the Object Window, navigate to Book and place Tutorial_DynamicBook by dragging it from the Object Window unto one of the barrels like below.
We also need a chest, or any other container. This interior cell already contains a few such objects, meaning you could skip this next step and simply reuse one of these objects when it comes to filling the Reference Aliases. For organization's sake, we will make our own chest.
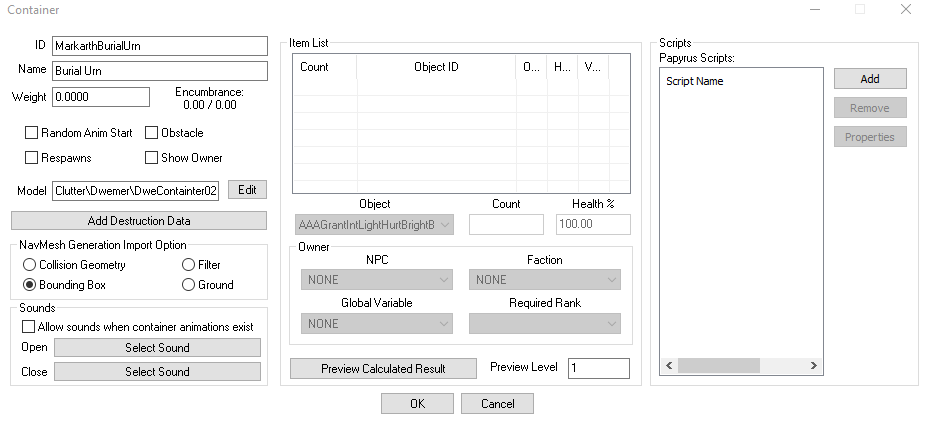
Go back to the Object Window and navigate to WorldObjects, then to Container. Pop it open and go to CLUTTER to find a list of containers including chests. We'll copy a pre-existing container for ease of use: double-click MarkarthBurialUrn. A new, mostly barren window will open.
Since the container is virtually as barren as it can get, the only thing that needs changing is the ID. Rename it to Tutorial_DynamicEntriesContainer; add a custom name if you want, it isn't necessary though. Press OK and Yes to create it as a new object. Drag it from the Object Window next to the barrel we placed the book on earlier.
Creating the Reference Aliases[edit]
We now have all the ingredients necessary to create the Reference Aliases, and you'll see why we had to place these objects into the world. Open your Tutorial_DynamicBookQuest again and navigate to the Quest Aliases tab: right-click in it and select New Reference Alias. This will open a large window, but thankfully only the first third of it is relevant to this method.
Our first Reference Alias will be the Dynamic Book.
- Click in the Alias Name field and give it the name DynamicBook
- Tick Uses Stored Text - this is extremely important! If you omit this, the method will not work
- In the Fill Type field, click Specific Reference
- Click Select Forced Reference: a new window named Choose Reference will appear. Within that window, click Select Reference in Render Window, then double-click on the Tutorial_DynamicBook we placed on the barrel earlier
If done correctly, your Reference Alias window should look like this.
Click OK and you have your first Reference Alias. We need a few more though. The next Reference Alias is going to be for the Tutorial_DynamicEntriesContainer chest we placed in the cell earlier. The process here functions almost identical to the one for the Dynamic Book - name the alias EntryContainer and double-click on the chest to select it as the forced reference. The only thing you don't need to do is ticking it as Uses Stored Text.
Next, we need to create Reference Aliases for the three miscellaneous items we made earlier. The process is functionally the same for all three, so I'll demonstrate it once. Create a new Reference Alias and name it ParagraphPlaceholder, then follow these next steps:
- In Fill Type, select Create Reference to Object
- Select the Tutorial_ParagraphPlaceholder item we created earlier in the first drop-down menu
- Select Create In and then select the EntryContainer from the third drop-down menu
- Don't touch the Level drop-down menu, it's irrelevant
Press OK to confirm this and then repeat this precise process for the remaining two miscellaneous items, naming the Aliases appropriately along the way. What this particular filling type does is generating the Reference Alias in the container you select; we could individually place them into the world as we did the book and chest, but that would mean more work and the possibility of the items despawning eventually.
Once this is done, we need to create one last Reference Alias. Getting the following steps right is crucial to making this method work.
- Create a new Alias as before, name it ParagraphToBeChanged
- Tick Stores Text - crucial!
- Don't fill this Reference Alias; click OK to close it
Now open the ParagraphPlaceholder Alias we made earlier, navigate to the drop-down menu Force Into Alias When Filled and select ParagraphToBeChanged.
What this does is filling the ParagraphToBeChanged alias with ParagraphPlaceholder's data; non-optional Reference Aliases that aren't filled will cause their parent quest to not launch properly, thus bugging out the entire quest. We could omit this part by making ParagraphToBeChanged an optional Reference Alias - however, the downside here would be that this would display an unsightly "[...]" filler text in the book that is the result of non-filled aliases being called by Text Replacement. With this method as I've described it, you can prevent that by using ParagraphPlaceholder as placeholder text.
With this done, your Quest Aliases tab should look something like this and we can move unto the next step.
Hooking It All Up[edit]
Setting up the Book[edit]
With the tedious part out of the way, we can now see about hooking it all up. Firstly, we need to open the Tutorial_DynamicBook item again: to do this, either search it up again in the Object Window or right-click -> Edit -> Edit Base the book you placed inside MixwaterMillWorkersHouse. You'll find it as empty as we left it. That needs to be changed. From here-on out, we'll work with Text Replacement.
Inside the Book Text field of the window, enter the following text:
<Alias=ParagraphToBeChanged>
If you now go in-game (don't forget to save your plug-in beforehand) and open the book, you'll find that it says "Paragraph Placeholder". If that is the case - very good! You've successfully followed the steps of this guide to this point. If it shows "[...]", that means the ParagraphToBeChanged Alias wasn't properly filled. This points to you not properly setting up the ParagraphPlaceholder Alias as discussed before. If nothing shows up, you've most likely forgotten to tick Uses Stored Text in the DynamicBook Alias or Stores Text in the ParagraphToBeChanged Alias.
We now need to see about phasing the text of the misc items into this.
Setting up the Script[edit]
The set-up as we have it alone won't do anything just yet. We need to set up an additional script that can change what the ParagraphToBeChanged Alias is filled with in order to change the text displayed inside the book. There are many, many ways one could go about this: too many to sum up here. A very simple method would be by creating an Activator that, upon being pressed, triggers a message box where the player can select the content of the Alias. This is the same way used to demonstrate this method in my demonstration video.
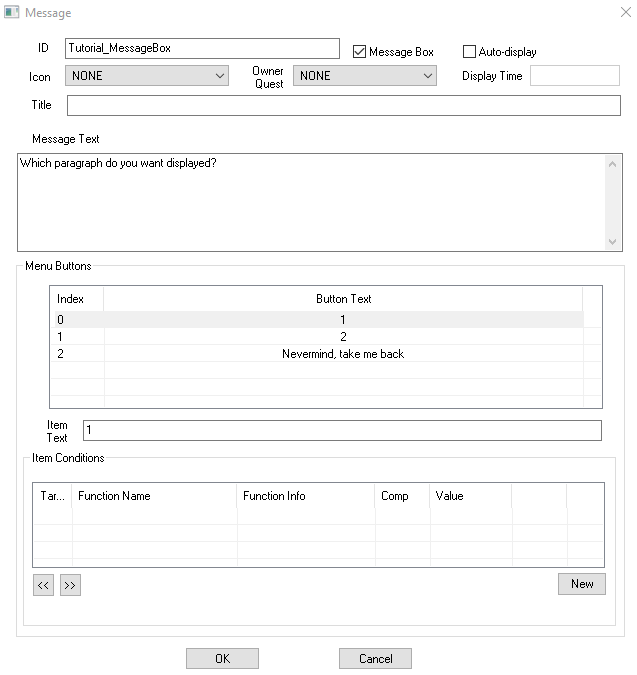
To do this, we need to place an activator into the MixwaterMillWorkersHouse cell. You can find activators in the Object Window by navigating to WorldObjects -> Activator. Pick one and place it next to the barrels. Create a message box named Tutorial_MessageBox under Miscellaneous -> Message with enough options for all the paragraphs you have.
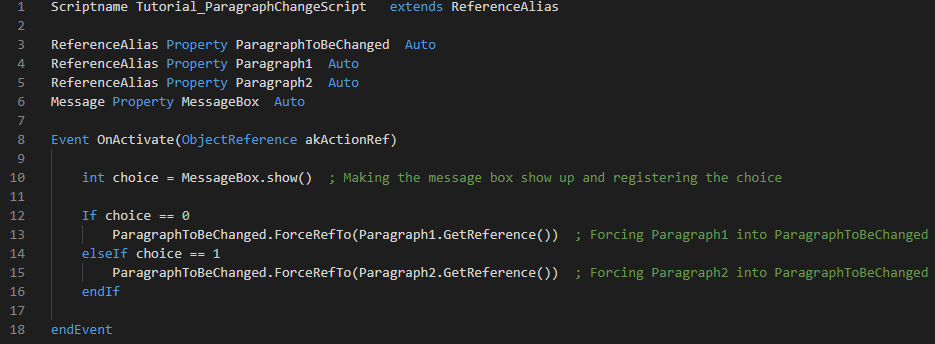
Next, hook up a script to the activator. You can do this either by hooking it up directly to the one you placed in-game, or by making the activator a Reference Alias and attaching the script to its Papyrus Scripts field. Call the script Tutorial_ParagraphChangeScript and give it the following properties:
- Message-type MessageBox property filled with your Tutorial_MessageBox
- Three ReferenceAlias-type properties filled with their Reference Aliases:
- ParagraphToBeChanged
- Paragraph1
- Paragraph2
As this is an activator, we'll need to use the OnActivate() event. To change the properties, we need to use the ForceRefTo() function.
Finishing Touches[edit]
Testing this out in-game will show that this works. Right now, it only switches to Paragraph 1 or Paragraph 2, though. To change this, open up the Tutorial_Paragraph1 and Tutorial_Paragraph2 miscellaneous items and enter your text into the Name field of their windows. As mentioned above, this way you have a limit of 259 characters! Now it's up to you to be creative with this method and expand it as you want.
