Arcane University:Masterfile Merging with MergePlugins
Cleaning with TS5Edit and Merging with Mators Merge Plugins
Older alternative to Arcane University:Masterfile Merging with Perforce
Hello, BS Teams and Skyrim fans,
there are a few merging procedures, Version Control and Merge Plugins are the most common ones. I find it straightforward and intuitive, and I think simplicity amplifies performance in a hobby community, so when I was asked I was happy to share what we found out about merge scripts using it the last 2 years.
Contents
1) Preparations (Installation & Pre-Merge-Fixing)
Installation
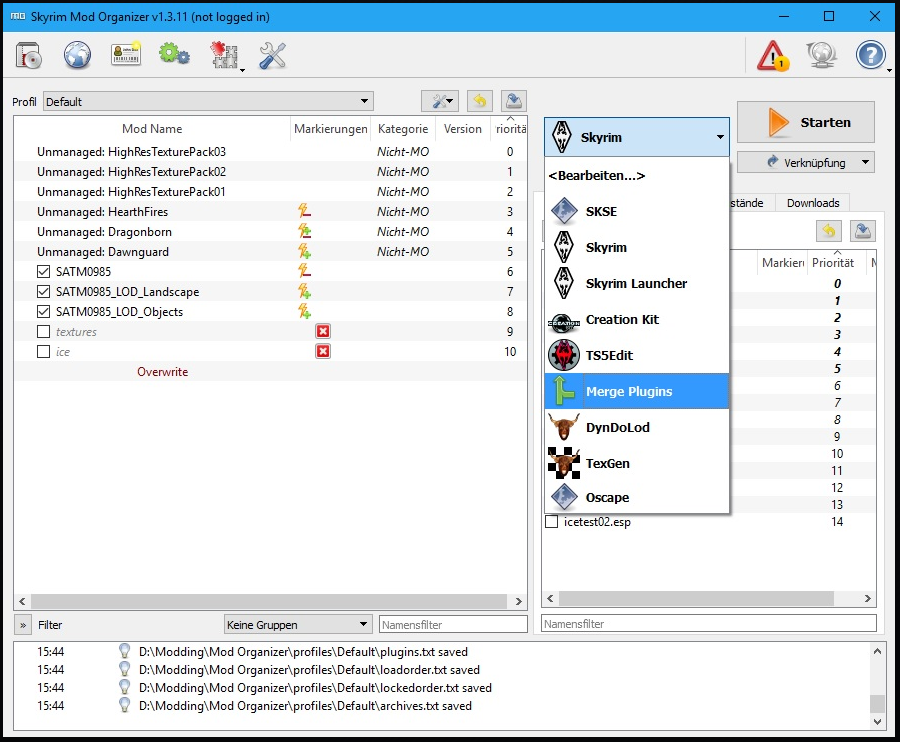
- You carefully downloaded and installed Merge Plugins by Mator: Merge Plugins
- Hint:Check at the bottom for settings and link to the script compiler download. Don’t worry, just copy-paste…
- Hint: You can use Merge Plugins outside of Mod Organizer, too. only I don’t really appreciate handling mod files with NMM and I would never dare to touch the steam folder, because of all the dirty edits that potentially arise when you consistently overwrite permanently the vanilla files. I even reinstall the game vanilla from time to time and have zero mods on the profile I use for development to keep it clean. Note that MO runs on a 32-bit basis, so any application based on the 64-bit technology will not run.)
- You have TES5EDIT: TES5Edit on Nexus to check your files before and after merge.
- (optional) You have set up Merge Plugins in Mod Organizer.
- (optional) You have a master file you want to update (esm). For the purpose of the merge, you removed the ESM flag in the header in xEdit, but the name is still esm since other patch files require it as a master. But technically, the ESM flag is a write-over protection flag, which means it does not allow MergePlugins to alter the entries, hence you have to change your master into a patch file in terms of flags, not in terms of naming convention.
- You have patch files (esps) [that had been built based on that esm, and now you want to merge these records into the esm to compile a new master build OR you create a master file from merging patches the first time]
- You have carefully checked every patch (esp) loaded with the esm at the same time; (pre-merge fixing shows no issues) (exactly in the order it will be merged, and you really have an idea about the 7 or so most common error types, and how to treat all occurring things within TS5edit; and resolved already all! unexpected errors. No critical errors are left. This is not optional, it can break your esm completely after the merge. Pre- and post-merge fixes should get its own thread and we should discuss it deeper at another point. It´s a central matter of quality control that modders releasing themselves on Nexus or working in big teams that they care for the quality of their contribution. It can practically freeze a big team's development if the management staff has to clean and redo all the contributors work; and Nexus mods have a high chance of breaking games or creating conflicts if not cleaned.)
Cleaning
- Load all files in order, apply filter for checking errors, check errors. Don’t get shocked, read the explanation of colours. Dark red = looses conflict, bright red = wins conflict.
- “Remove identical to master records” (I always do that) will remove entries that are there and overwrite but do not fill new content. Unnecessary dirty edits.
- “Undelete deleted references” will remove the delete flags that had been set inside an esp to delete references within an esm. (not recommended if stuff was deleted on purpose! This will restore deletions of your Implementers Level Designers choice regarding master build entries!)
- If a reference is missing, it must be either filled in TS5edit or CK OR you completely remove it. This can cause a CTD (Crash to Desktop, aka break the game)!
- If things get overwritten, you can actually drag and drop the correct entries onto the “wrong” one, or simply enter IDs. This can be super convenient when resolving conflicting Level Design!
- you should always remove any Navmesh record if your contributor/you didn't navmesh on purpose. Auto-generated navmesh is a big source of trouble, and manually deleting it in TS5edit will cost you time.
- the VMAD error is a reference deleted (trigger box for example) like the usual “reference deleted but contains base object” – those can be deleted on purpose. If so, ignore them.
- I recommend you to read this, defining errors and treatment: Cleaning Guide - TES5Edit
- I recommend also this youtube tutorial by the developer of Merge scripts/Plugins himself: Cleaning Errors before merge of esp files (Mator)
- I also recommend, if you are new to TS5edit, this video: Cleaning Errors of esp files in TES5Edit
But for now, let’s assume our master (ESM) and patch files (ESPs) are clean and ready to move on with the process.
2) Merging the Files
a) Load merge plugins! (I am a MO user)
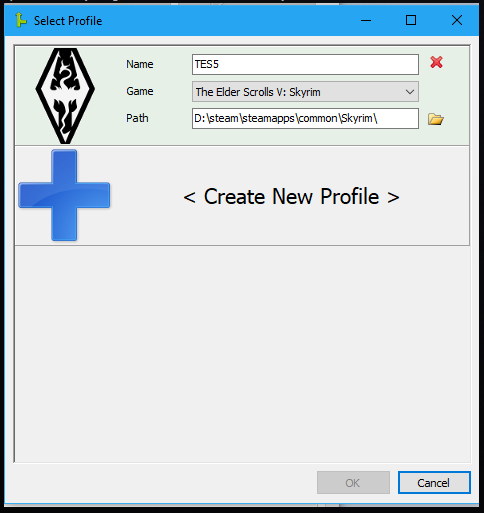
b) Let it locate your game folders, load the correct profile.
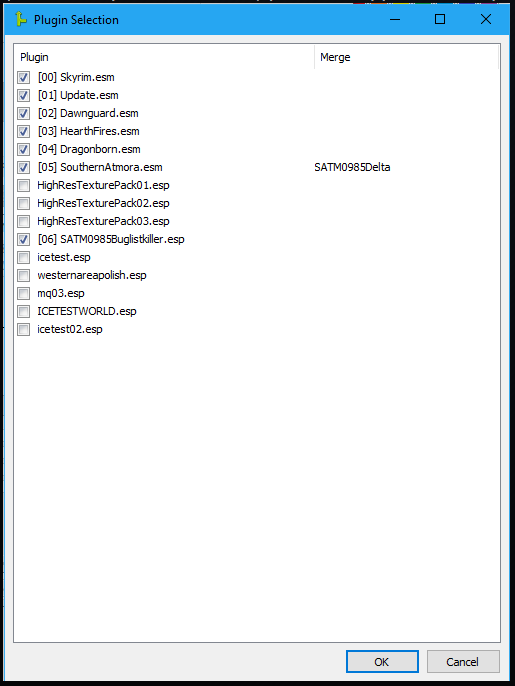
c) Check which files you want to be loaded in. (my files are a bit empty because the new cycle just started right now)
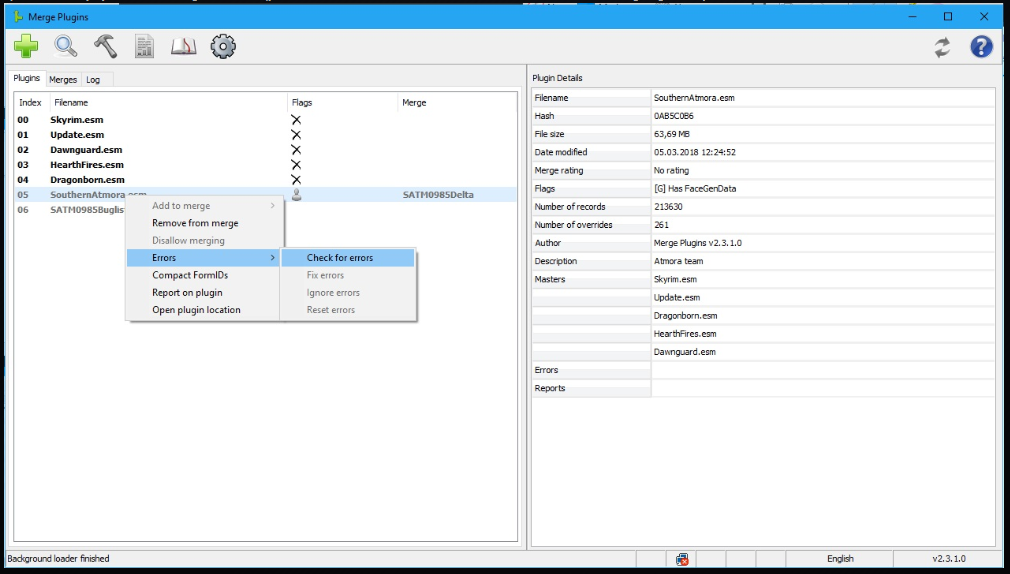
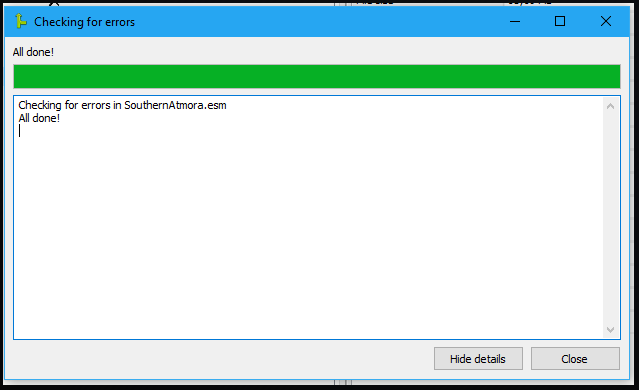
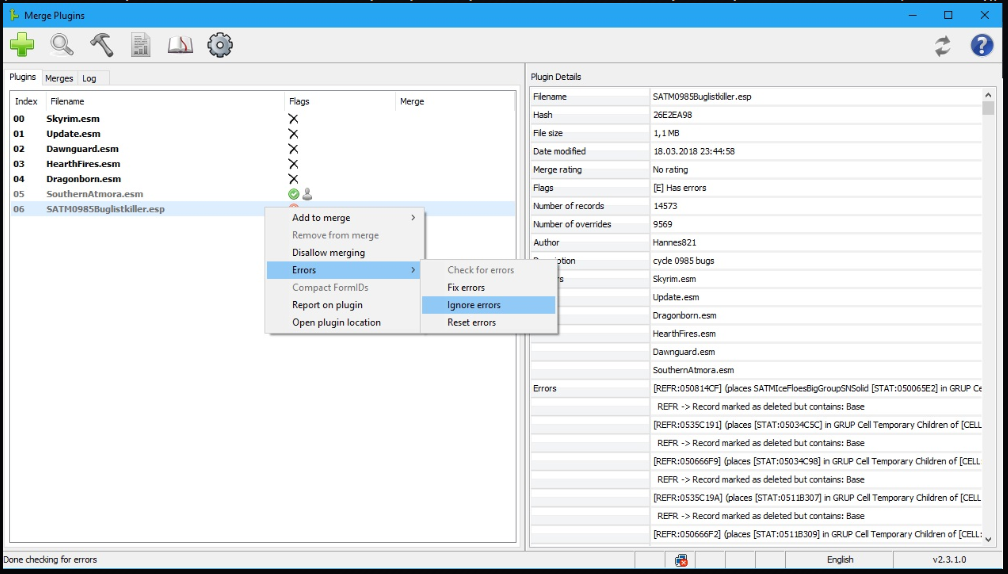
d) Check the esps you want to merge for errors.
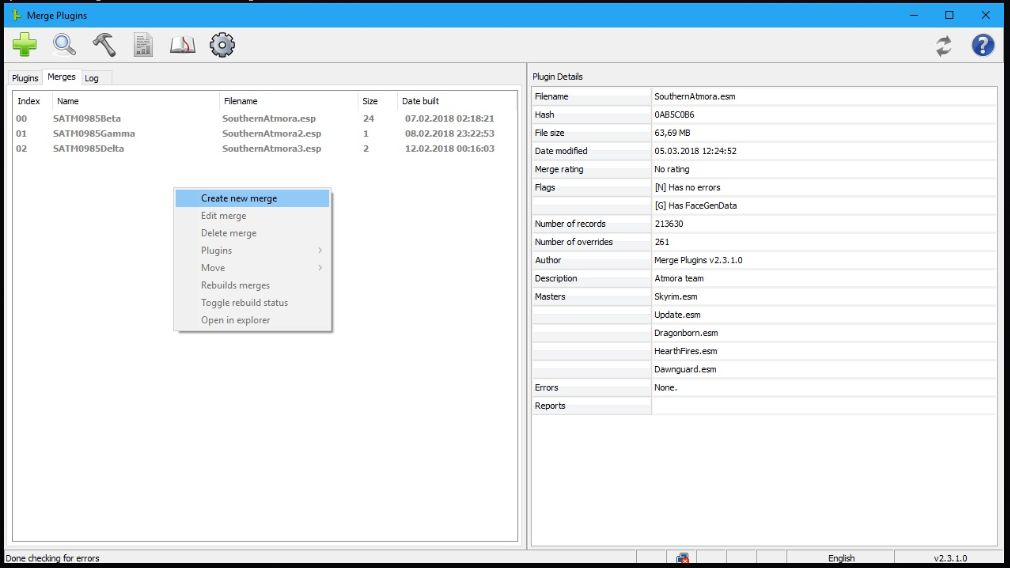
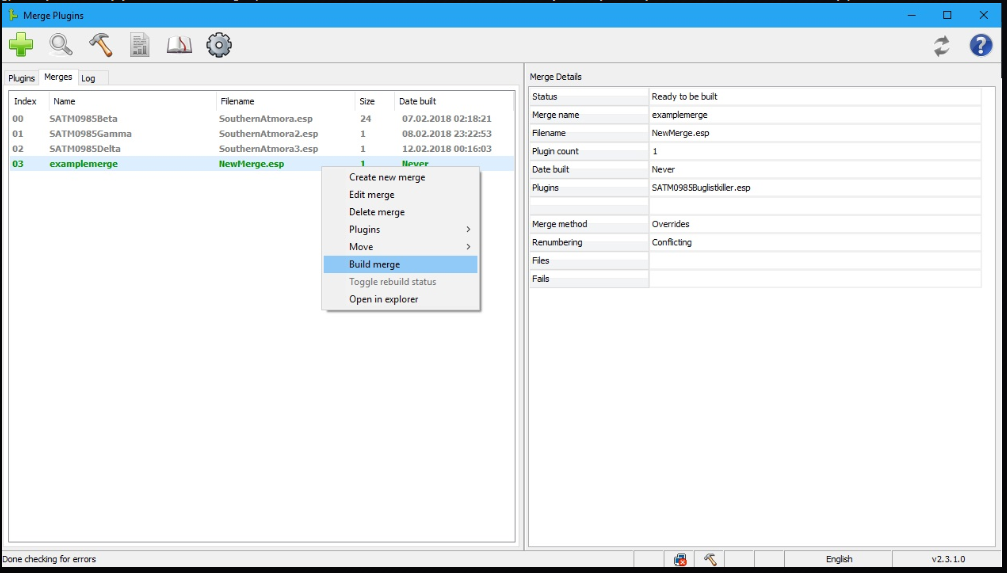
e) Go in the “merges” tab and add a new merge.
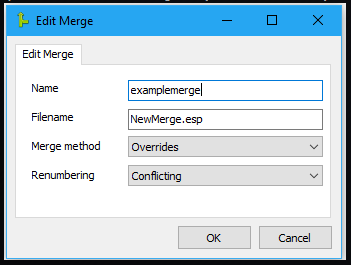
f) “Overwrites” and “conflicting” always worked without any issues, all Form-IDs match afterward. What it does is, if you have similar FormIDs in your patch files, they will be overwritten by a new ID, and this new ID is created counting up; searching the lowest free hexa-decimal ID in the master, as all patch IDs get the master ID prefix now (06 becomes 05, and sorted into the list of master entries).
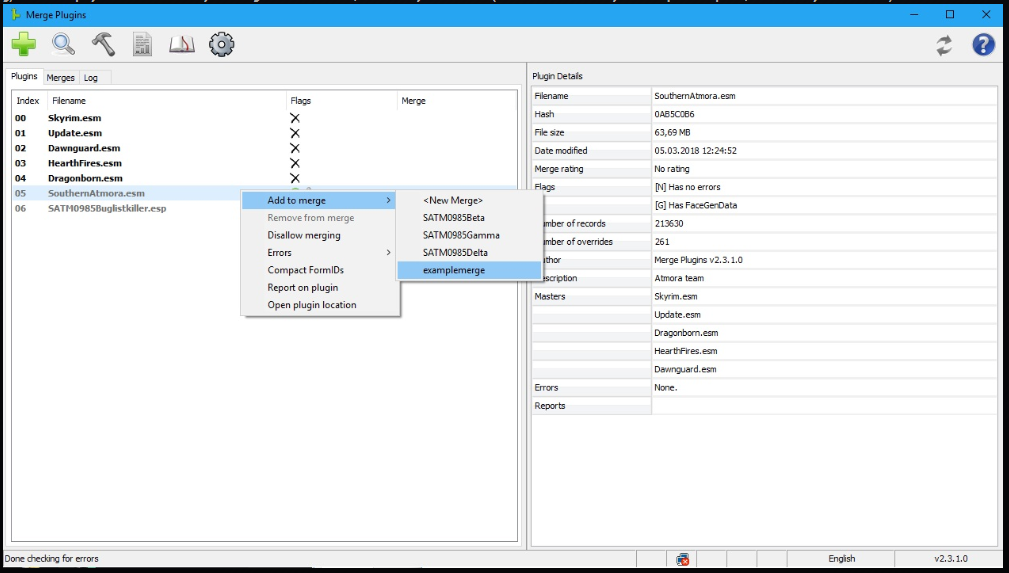
g) Add the esps you want to have to your merge. Mind the order, start with your old esm. (which should formally be an esp at this point, but I mean your main file).
f) If your esps have errors you need to set “ignore errors” to be able to merge the esp in. (That can be normal if you deleted references from the esm within your esp on purpose for example; but for that reason, its absolutely essential you UNDERSTAND the errors! (see links on top))
g) Now, you can simply click on “build merge”! (The same command like the hammer button in the top menu, you can push it, if the text does not show up!)
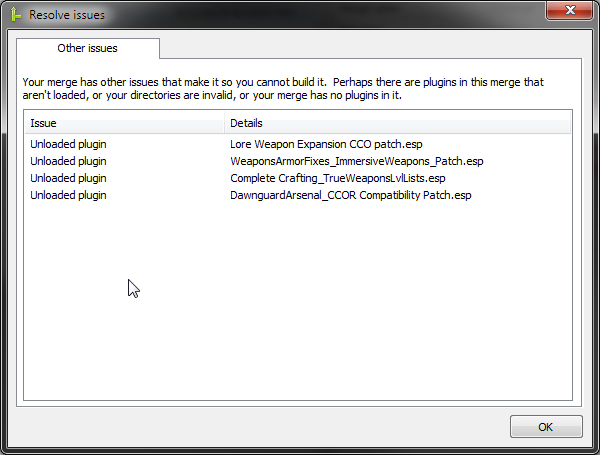
If you cannot click "build" yet, then click on the build and "resolve issues". A new tab appears, specifying the problems. You can again ignore them, use the build in resolver (contact Mator for the details) or go back to clean your master.
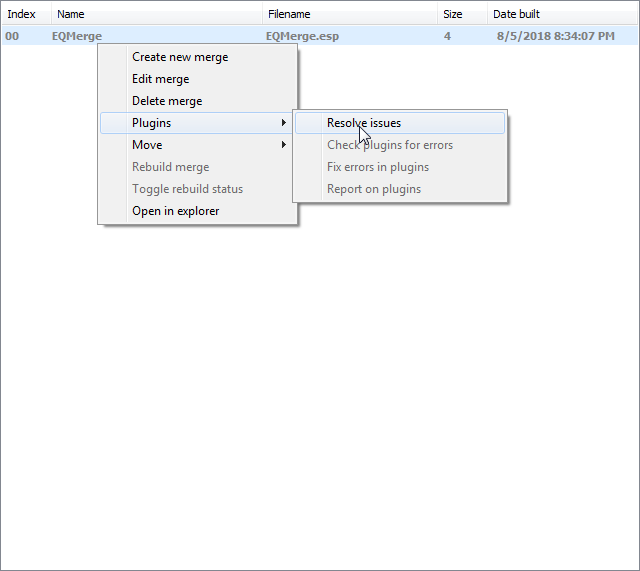
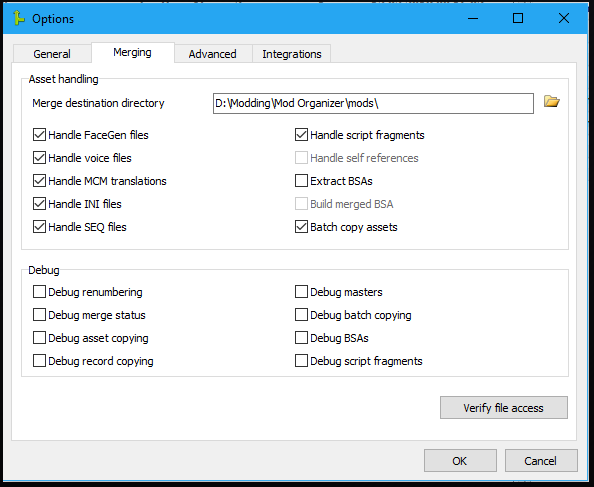
f) Hands off! (after the successful merge, you should click done, and then (AFTER you also close the Merge Plugins!) it will only create the newly merged esp (your new esm master build, yet flagged as esp) in the output folder/examplemerge folder (see the name I gave it above). Talking about Output folders, it is set up in settings as shown below:
g) Settings for the Merge Plugins
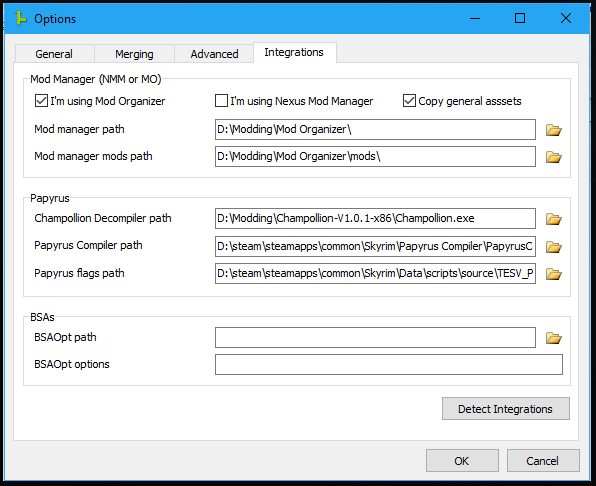
…check these settings, download the Champollion compiler who can handle the scripts! (update: the exact paths, because hard to read in the screenshot, are
- …/Skyrim/PapyrusCompiler/PapyrusCompiler.exe
- …/Skyrim/Data/Scripts/source/TESV_Papyrus_Flags-flg (you need to create this folder and unpack and insert vanilla scripts!)
- You can download Champollion here: (32bit only for classic Mod Organizer users!): [Champollion Compiler on Nexus]
- Also, you need to have the unpacked vanilla scripts at hand, in your steam folder. (simply download the unpacker for BSA files of your liking from nexus and then create a scripts/source/… folder in your steam folder;
copy in the scripts of the vanilla game. Check the screenshot above, its “Papyrus flags path“.) Set this up carefully, or your scripts do not get handled the way they have to, to be recompiled, and there is a chance you can throw away your Quests if IDs got renumbered on Merge!
h) The disadvantage of this merging method:
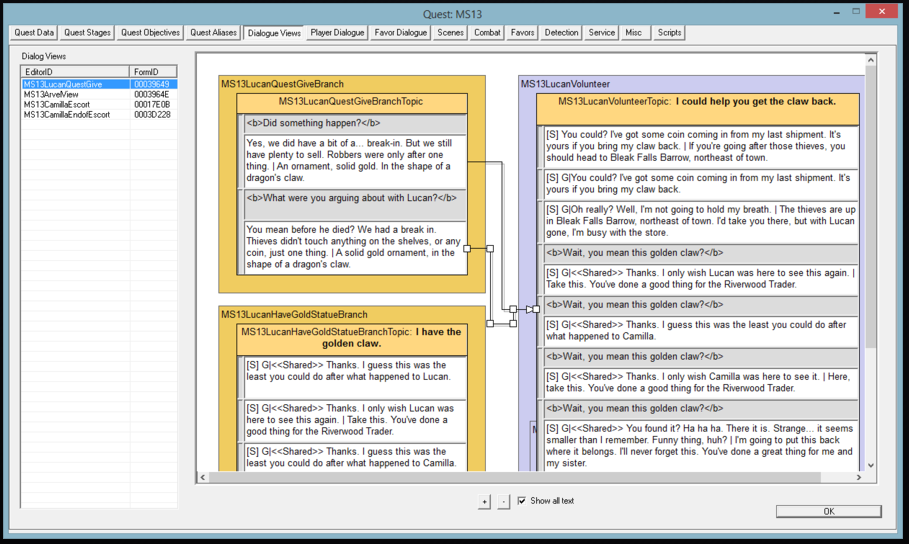
Also note that the Dialogue views tab (first screenshot below) Branch locations (yellow and gray boxes) on the interface aren’t saved, so that gets screwed up. Dialogue Views Branches will all be sitting on top of each other at the top left corner. You can drag and drop them out of each other again; but it would cost you a few minutes extra.
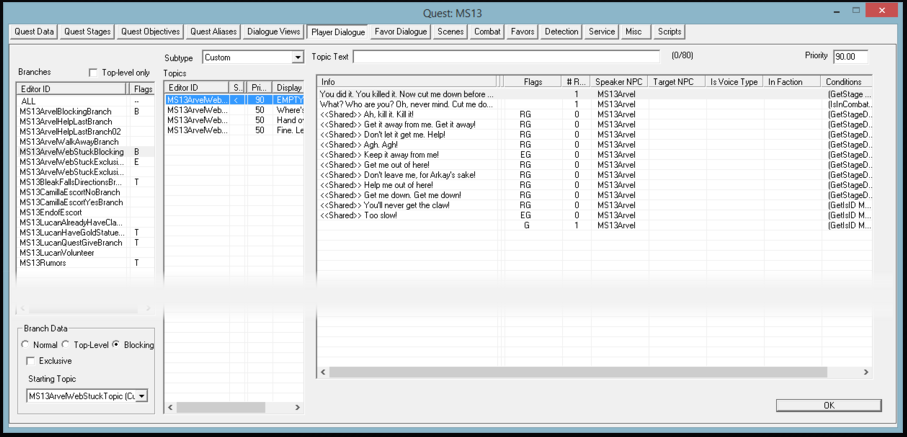
However, we talked a while ago if there is the option to export an excel from CK and then re-import. There may be a clever workaround to store that coordinates of the Branch windows. But in reality, I prefer working with the excel-chart like Player dialogue tab (second screenshot below); especially when handling many topics, so I don’t really think it changes anything or is a real downside myself.
(This is more handy for me:)
h) The advantage of this merging method: It is easy, clean, fast and straightforward.
i) Finalising the esp before flagging it as esm again.
You should open your esp now in CK first, and click save; so all the “deleted flags” set by newly merged in esps regarding esm content actually do delete finally. (The “esm” being a protective flag against edits on an esp, did hinder this process previously. After that, the “Deleted base” error on your esm in TS5edit should be gone. This is one of the error types when checking in TS5edit that are non-critical, if you know what you deleted and you did it on purpose.)
And finally, you only have to rename it so it has the same name as the old build (Southernatmora for us) and flag it as ESM in TS5Edit again. After that, the esp is ready.
3. Post-merge Fixing
(here is where I would usually start my post-merge cleanup directly on the esm or even create a new esp and then merge again; soi can read out editor warnings with done fixes and effectively reduce all CK error warnings step by step. You can find them in a notepad doc inside your steam folder, called “EditorWarnings.txt”. I strongly recommend to copy paste all content in an excel chart, filter it and auto-mark with color all entries with the ID of your master file; you will sometimes have thousands of warnings, but that’s no problem, it simply prints this warning each time its appearing, so if you have an error on a mesh; and that mesh has 3 nitrishapes with wrong shader settings, and you have that mesh 100 times in your dungeon, you already get 300 errors, however, you only have to repair 1 mesh eventually).
Final Words
I hope this tutorial provides you with a good workflow for creating a new master build in a lean fashion. We would be happy to update this with your feedback, please write us on the discussion page or contact us (Hannes821) on discord or any AU teacher. Special thanks to Tascani who worked with me on this, we created this workflow over 2 years in trial and error. Good Bug Fixing and Merging all of you!
