Difference between revisions of "Arcane University:Blender 2.8+ Export"
m (Minor correction and more succint heading) |
|||
| Line 42: | Line 42: | ||
== Animation settings == | == Animation settings == | ||
| − | When using an armature modifier, make sure that "Preserve Volume" is checked. It does not affect how your mesh is exported, but it makes sure that the deformations you see in Blender will be the same as the ones in-game. | + | When using an armature modifier, make sure that "Preserve Volume" is '''un'''checked. It does not affect how your mesh is exported, but it makes sure that the deformations you see in Blender will be the same as the ones in-game. |
| − | == | + | == External tutorials on the same matter == |
*https://www.youtube.com/watch?v=sVXMeENfbO0 | *https://www.youtube.com/watch?v=sVXMeENfbO0 | ||
Revision as of 08:22, 17 October 2020
This page documents how to use the develop branch of the Blender Nif Plugin to export models for Skyrim. The version for 2.8 (and potentially up) is still in active development, so it may be subject to change.
Contents
General settings
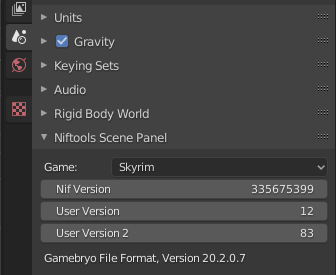
Under the scene tab, set the game to Skyrim. This will automatically set the version, user version and user version 2 to the correct values, so no need to change those.
Object hierarchy
For a static, you want a hierarchy like so:
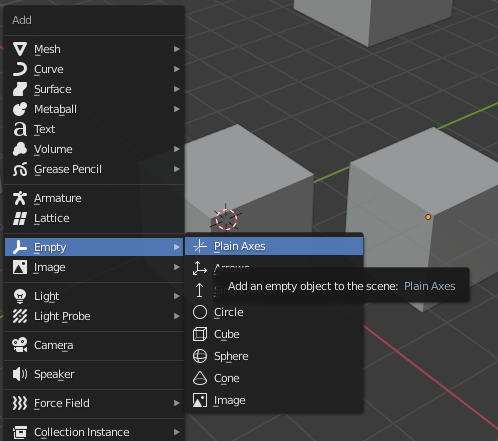
Note the empty axes object, to which all other objects are parented. This is because the plugin needs an object to function as our 'root'. What this exactly means doesn't really matter, but suffice to say that every NIF file has one, and we want one, too. We need a representation of this in Blender. To do this, do the following:
- Create an empty axes object (create menu accessed via
Shift+A):
- Parent all other objects you want to export to it by selecting them first, and then selecting the empty axes object (use
Shiftin the viewport orCtrlin the object hierarchy menu for multiple selection). The axes object should be yellow, to indicate it is the active object, and the outline of the other selected objects should be orange. - Press
Ctrl+Pto parent the objects to the empty axes object.
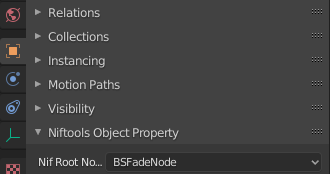
For non-rigged meshes (static, simple clutter etc), you should set the Nif Root Node of the axes object to BSFadeNode, like so:
Shaders
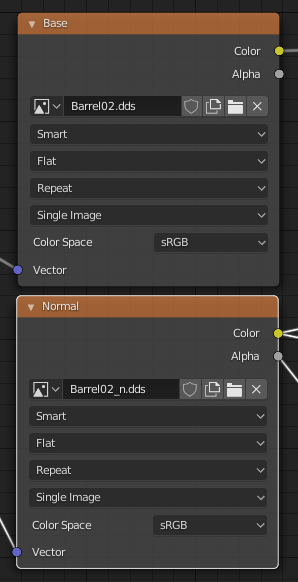
The newer plugin, unlike previous versions, uses material nodes for its shaders. It is currently very simple:
- Make sure the texture you want to use as the diffuse is called 'Base', and the texture you want to use as the normal map is called 'Normal', like so:
Most of the other settings are currently the same as in Blender 2.7+ Export
Animation settings
When using an armature modifier, make sure that "Preserve Volume" is unchecked. It does not affect how your mesh is exported, but it makes sure that the deformations you see in Blender will be the same as the ones in-game.


